Polaris Offline mode allows libraries to continue providing services when the Polaris server is unavailable due to maintenance, upgrades, outages, or data migrations. This guide outlines how to prepare for and use Offline mode in the Desktop Client and ExpressCheck. Use this article for information on using Leap in Offline mode.
Using Polaris Offline Mode During an Outage
Key Points for Using Polaris Offline Mode During Outages
- Optional Use: Using Polaris Offline during unexpected outages is optional. Alternatives like scanning barcodes into documents or handwriting them are acceptable. Consult with CLC if you choose an alternative to avoid issues.
- No Need to Notify CLC Beforehand: You don’t need to inform CLC before going offline, but please notify us afterward so we can monitor potential issues.
- Checkouts Only: Use Offline mode exclusively for checking out items. Do not perform check-ins while offline.
- After returning to online mode, ensure that you upload and process all offline files before starting any check-ins.
- Avoid Patron Registration: Registering patrons in Offline mode requires special setup. Avoid this unless necessary.
- No Payments: Fine payments cannot be processed in Offline mode.
- ExpressCheck: Offline mode is available on the Polaris desktop client and ExpressCheck.
- Leap Offline: Find out more about using Leap Offline Mode.
Preparing for Offline Mode
Regularly review these steps to ensure your library is ready for unexpected outages:
- Install the Polaris Desktop Client
- Update Offline Configuration Files:
- Obtain the latest files from
\\proddb.clcdpc.org\Offline(updated daily). - Copy them locally and distribute to staff and ExpressCheck workstations.
- The default location for the configuration file is:
C:\ProgramData\Polaris\[version]\Offline
- Obtain the latest files from
- Check Permissions and Antivirus Settings:
- Exclude Polaris Offline directories from antivirus scanning.
- Ensure correct file permissions to avoid Error: Client session initialization error 0.
- Enable Workstations:
- Use Offline mode only on enabled and licensed Polaris workstations.
- Configure Receipt Printers:
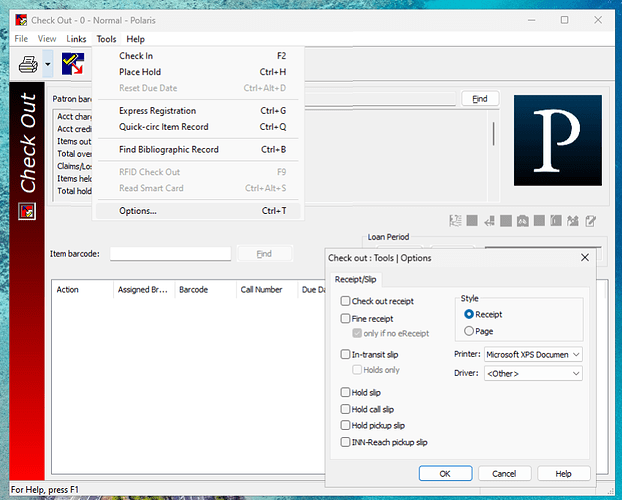
- In Offline mode, go to Circulation → Checkout → Tools → Options to set up receipt printers.
- Manage Hard Drive Protection Tools:
- If using tools like Deep Freeze, ensure a “thawed” location for transaction files to prevent loss on reboot.
- Consider File Storage Locations:
- Saving transaction files to a shared location can simplify backups and uploads.
- If the share goes offline, STOP PROCESSING IN OFFLINE and alert IT staff immediately or transactions will be lost.
- Verify Loan Periods and Branch Settings:
- Polaris uses the branch’s default loan period in Offline mode. Ensure it aligns with your policies.
- Receipts display the branch associated with the logged-in staff member.
Using the Polaris Desktop Client in Offline Mode
- Starting Offline Mode:
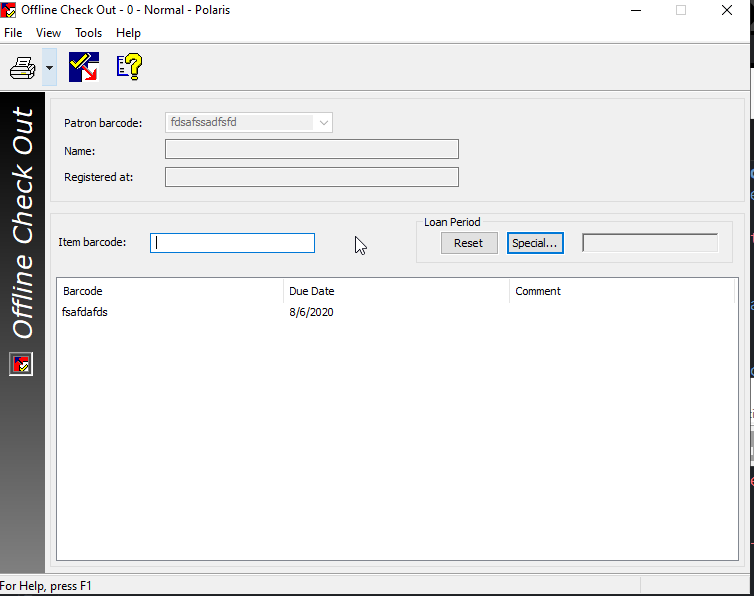
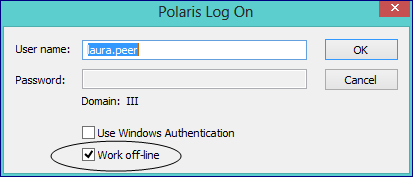
- If the desktop client doesn’t automatically start in Offline mode, launch Polaris, check “Work off-line,” enter your username and domain, and click OK.
- If auto-login is enabled, log off and log back in with “Work off-line” checked.
- Performing Checkouts:
- Navigate to Circulation → Check Out.
- Loan Period Settings: Verify the loan period matches your offline policies.
- Batch Checkouts: Group items by material type if you’d like to use the special Loan Period feature for different due dates.
- Patron Verification:
- Scanning a patron’s barcode should display their name if they are in the offline files.
- If the name doesn’t appear, check for scanning errors or outdated offline files.
- Decide whether to proceed with unnamed patrons based on your library’s policy.
- SearchOhio/OhioLINK Items:
- You can check out items previously received with a status of “Held.”
- Ending a Session:
- Press Enter with a blank item barcode to finish a session and print the receipt.
- Flush Transactions to Disk once an hour:
- CLC recommends closing the Desktop Offline Client and reopening once an hour to flush transactions to the hard drive. Otherwise a local power outage might cause data loss.
Using ExpressCheck in Offline Mode
- Starting Offline Mode:
- If ExpressCheck starts during an outage, it will prompt to use Offline mode. Click Yes.
- If the outage occurs after startup, reboot the ExpressCheck machine to enter Offline mode.
- You may need to perform a hard reboot by holding the power button until the screen turns off, then restarting.
- Patron Barcodes Required:
- Patrons must scan their library barcode; typing is not permitted in Offline mode for security reasons.
- The patron’s barcode must be in the offline file. Newly registered patrons during Offline mode cannot use ExpressCheck.
- Fines Not Blocked:
- ExpressCheck does not block patrons with excessive fines in Offline mode.
- To prevent such patrons from using ExpressCheck, remove them from the PolPatrons.mdb file using a SQL script in Microsoft Access. This article explains the meaning of blocking codes in the offline PolPatrons.mdb file.
Uploading Offline Files
After a service outage, wait for confirmation from CLC before processing offline files. Do not assume the problem is resolved because Polaris is momentarily accessible.
Check with your local IT staff for any special procedures before proceeding.
- Process Before Check-Ins:
- All offline transaction files must be uploaded before checking in any materials.
- During migrations, CLC staff will inform you when it is OK to start check-ins.
- Order of Upload:
- If you registered patrons offline, upload those files before general checkout files.
- Process ExpressCheck Files First:
- If you used ExpressCheck offline, process those files before other files.
To upload Polars Desktop offline transaction files:
!!! DO NOT begin to Check-IN items until ALL Offline files have been processed.
- Log into Polaris Desktop Client normally.
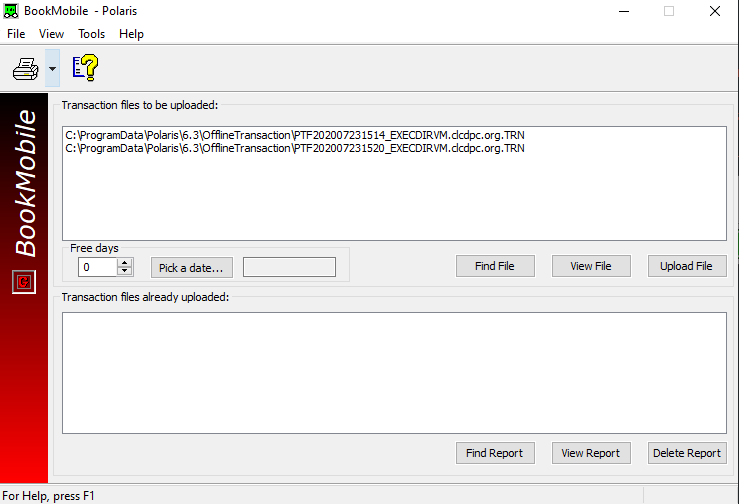
- Navigate to Circulation → Bookmobile:
- Your files should appear. If not, click Find File to locate .TRN files. Find out more about the offline file location.
- Ignore “Free Days” and the date picker; those are for check-in files.
- Select and Upload Files:
- Select one or multiple files (hold CTRL to select multiple).
- Click Upload File.
- Handle Errors:
- Choose “Continue and get error report in the end” if prompted.
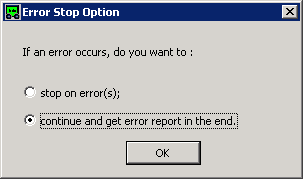
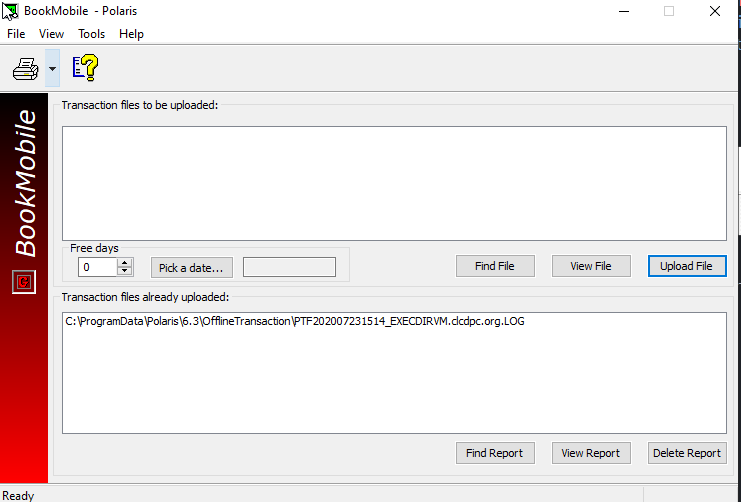
- After processing, .LOG reports are created for each .TRN file.
- View Reports:
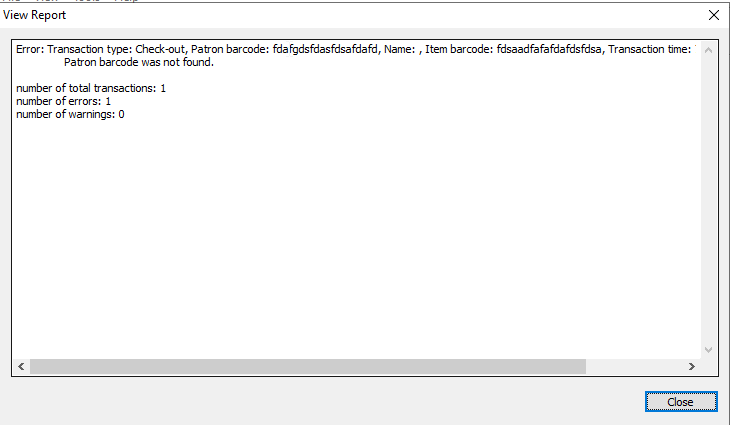
- Click View Report to see processing results.
- Messages are usually informational.
- If no transactions were processed, contact CLC via a HelpDesk ticket.
Uploading ExpressCheck Offline Files
ExpressCheck offline files must be copied to a Polaris staff desktop client before processing.
Your IT staff or Polaris technical liaison should:
- Copy Transaction Files:
- After the offline session, copy transaction files from ExpressCheck (typically
C:\ProgramData\Polaris[version]\OfflineTransaction) to the OfflineTransaction folder on a Polaris desktop client.
- After the offline session, copy transaction files from ExpressCheck (typically
- Process Files:
- Restart ExpressCheck:
- Reboot ExpressCheck workstations to return to online mode.
Extended Offline Periods
For extended offline periods, back up transaction files regularly. This may include copying files from workstations and servers or photocopying handwritten records.
